16. How to Click-in and Click-out of clipless* pedals if you ride on the LHS of the road Click on RHS, if you cycle on the RHS of the roadway
Invariably most cyclists who graduate from basic platform pedals to Click-in pedals ie. SPD, Crank Brothers, LOOK, etc will acknowledge that they fell over - that slow awkward, dreaded fall to the left or right - at least once whilst learning how to use them.
By applying the following simple 15 steps which specifically relate to using Shimano SPD pedals, you don't have to suffer those awkward falls:
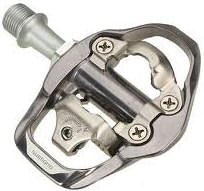
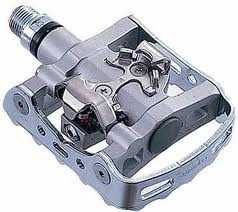
1. Because you want to be able to get-in and get-out of your pedals easily, loosen the adjustable pedal clip tension small hex bolt (visible at bottom of G, I and J below) on each SPD pedal to its loosest by rotating the small hex bolt approx. 2 revs anti-clockwise (ie. twds the minus insignia.) How to tension your SPD pedals - YouTube
2. Pick a large quiet parking lot or quiet street to practice the following 'beginners tips'.
3. Always start riding on a slight downhill or flat ground. You can start on a steep descent or ascent, however, best not to until you become proficient. No harm in walking to the next flat ground or slight downhill.
4. Make sure that you are NOT in the big chain-ring on the front or a SMALL cog (of your cassette) on the back, unless you are starting on a steepish downhill because it would place too much strain on your legs.
a. To drop down to the mid ring on the front, push your little black lever inwards (to the right) on the LH shifter so the chain moves to a smaller chain-ring.
b. To move to a larger cog on the back cassette push the entire right shifter (silver and black levers), lift the rear wheel and spin your pedal cranks so the chain moves to a larger cog.
5. Angle your bike so the wheels are at least 30mm away from your feet (ie. your bike is on an angle of at least 20o leaning twds you at the top). If you have your bike more upright ie. almost vertical, you might fall over to the other side upon clicking in your right foot.
6. Straddle your right leg over your angled bike and rotate anti-clockwise the right pedal (the pedal furthest from you) to the bottom of the rotation (ie. so that pedal is at 6 o'clock) because it is easier to click the cleat in when the pedal is at 6 o'clock.
7. Clip your right cleat into the right pedal by pointing the front of your right foot downwards at about 30o (from the horizontal) and insert the toe of the cleat into the clipless pedal first and then drop the heel of the cleat in shortly afterwards whereupon you will hear an audible, comforting " click".
8. Rotate the right pedal anti-clockwise with your right foot clicked-in up to about 10 o'clock, so you can push down on the right pedal to "take off' (commence cycling).
9. Straighten your bike 'til it is about 10o off vertical and push down with you right foot and move you weight so your bike is vertical. Yippee, you are underway.
10. The key to clipping your left foot in is to do it slowly, don't be in a rush and watch the physical movement of clipping it in. Don't just 'push down and hope' that you get it in. Again, bend your left foot slightly downwards, so you insert the toe of the cleat in first. Then drop the heel down to hear another comforting/reassuring "click". Another Yippee.
11. To release your foot from the pedal you simply twist the heal (preferably) outwards. Do not try to pull your foot out, merely twist your heel. Also once you become confident, practice twisting your heel inwards to release, because sometimes when the cleat is old and nearing replacement (usually after about 10,000km) it may not release easily. Because if you ever struggle to release your foot by twisting your heel outwards, it is comforting to know that you can release it by twisting inwards.
12. Practice clipping-in and clipping-out 'til it bores the hell out of you, so even if you are brain-dead one morning, you won't suffer that nasty fall mentioned above.
13. After a few weeks of using your cleats, progressively tighten the small hex bolt about half a rev (visible at bottom of G, I and J below) on each SPD pedal until eventually it feels too tight and then release it 'til it feels easy to use. This is usually between loosest (on the LHS of hex bolt) and mid way. You always want to be able to clip-in and clip-out easily. The only time you might find the pedal is too loose is if you feel it coming out when you are climbing up a steep hill (under load) and you feel a foot slip out when you are on the pull position in the up curve.
14. When you pull up, and need to re-start, make sure that you are NOT in the big chain-ring on the front or a SMALL ring on the back unless on a steepish downhill. Perform 4. above, and practice it, for once you master it, it will only take a few seconds to switch into an easier gear ration to re-start. Until you instinctively observe the discipline of always checking your current gear ratio, it can cause you some grief incl. unpleasant knee twinges.
15. In summary, when learning how to use cleats, best to walk to flat ground or a downhill and NOT try to start on a steep incline.
This 'You Tube' Using Clipless Pedals is good, but it doesn't highlight starting on flat ground or a slight down hill. Nor does it recommend inserting the second foot slowly and deliberately and watching as you do it, rather than pushing and hoping. It also recommends that you rotate the second pedal to 6 o'clock. I have found that experienced cyclists rarely do that, and it is unnecessary provided you look down and watch the second foot click in. But that is your call.
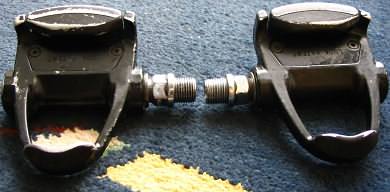
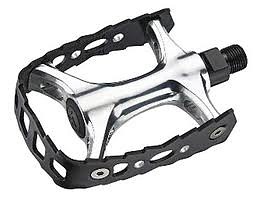
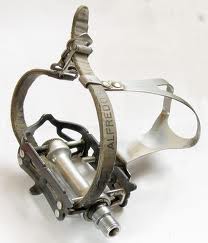
* The above described pedals are rather incongruously called Clipless, yet they actually clip in. They earned the titles Clipless in 1984 when the French company LOOK applied downhill snow skiing binding or cleat technology to pedals producing the first widely used clipless pedals - C below. Prior to that cyclists would clip their foot onto their platform pedal by tightening a leather strap secured by a clip which is known as a toe-clip - B below.
| A | B | C | D |
 |
 |
|
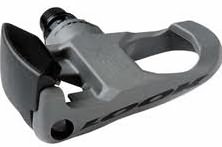 |
| Platform pedals | Old fashioned toe-clip pedals | Original LOOK 'Clipless' pedals launched in 1984 | Modern LOOK pedal |
| E | F | G | H | I | J | |
 |
 |
 |
 |
 |
 |
|
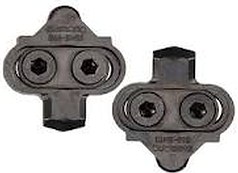
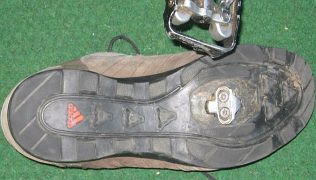
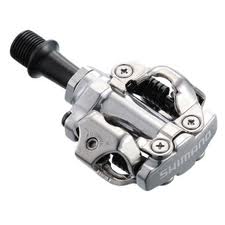
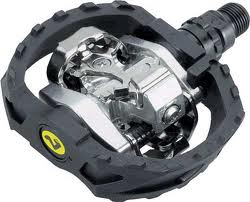
| SPD cleats | Soul of a mountain bike shoe with an SPD cleat | Dual sided SPD mountain bike pedal also used by a lot of recreational road cyclists | Dual sided SPD mountain bike pedal with an outer shell support to enable riders to wear flat soul sneakers | Single sided SPD pedal | Platform pedal on one side and
SPD pedal on the other side |
The below pertinent URLs are sourced from Servicing your bike:
11. Fitting SPD cleats Movie: How To Install SPD Cleats Fitting cleats for SPD-SL and SPD pedals SPD Pedal/Cleat Interchangeability Shimano SM-SH40 Cleat Pontoons to fit SPD cleats to a road shoe
